Description
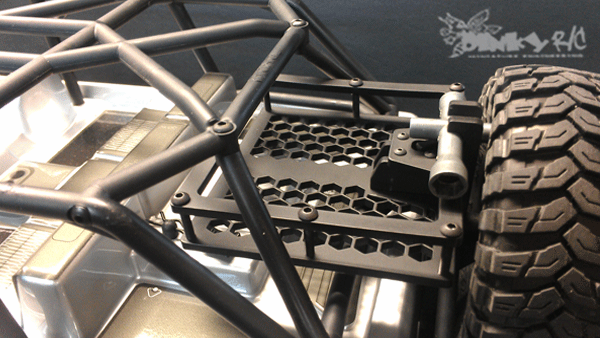
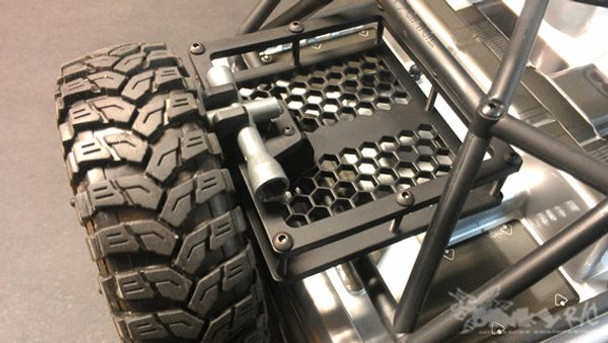
The Axial JK Swing Out Tire Rack was designed specifically to fit the Poison Spider
Rear bumper set that is included with the Stock Axial JK Rubicon kit.
Store your extra trail gear in an easy to access Tire Rack.
More protected, and less exposed than a normal Roof Rack mounted to the top of your truck.
While still being easily accessible when you need to grab a Tow strap,
or other functional trail equipment.

Our JK Swing Out Tire Rack even Stows away your 4-Way wrench for easy reach,
when your out on the trail, and you need to check yo nutz!

Keep your trail gear more protected during your next outing!
Your Tire Rack will come partially assembled, and ready for installation.
All necessary hardware IS included.
Simply follow the installation instructions listed below.
-Instructions:
(Pictures coming soon!)
First, grab your 4-way wrench, everyone has a few, right?!
After removing the (6) 2/56" from the vertical mounting bars,
Insert the 4-way into the circular notches ,
one vertical bar, on each side of the tools center.
Now mate the pre-assembled Rack with the two vertical mounting bars.
You can now re-insert the (6) 2/56" screws you just removed.
Orientation should be easy to see at this point.
4 bolts in from the top, and 2 bolts in from the bottom.
Your Swing Out Tire Rack is now assembled !
You'll only need to remove the oblong shaped body post,
the one that attaches to the roll-cage portion of the tire carrier.
Once you have that removed,
carefully trim off the two raised portions of each of the long sides.
Making it narrow enough so that the vertical pieces of your Roof Rack
will fit around it snuggly, when mounted vertically.
Mount this back where it came from, leaving it just a bit loose to allow for adjustment.
Now locate the upper and lower "slots, that line up vertically, by two,
on the rear of your spare tire mount.
You can now remove the 4 shorter 2/56" screws from the two vertical bars.
Re-inserting them thru the upper and lower sets of "Slot" in your tire carrier.
The two vertical bars should now be straddling the oblong body post piece we modified earlier.
And your Swing Out Tire Rack should be mounted!
It IS possible to use the stock body clip thru the same set-up as before you installed your rack.
But it's a difficult trick to get it done easily.
What we highly recommend, is to use the smallest of your L-wrenchs,
(or the next step up if you heat it carefully first), as your substitute body clip.
It will be retained by your 4-way wrench, that is now mounted ON your vehicle,
always withing easy reach while out on the trail.
The 4-way wrench will also work to retain your L-wrench/body-clip
that you now also have mounted ON your vehicle.


